Serving Palm Beach County

Available 24/7 - Give us a call 561 968 0000

Author: Nasli

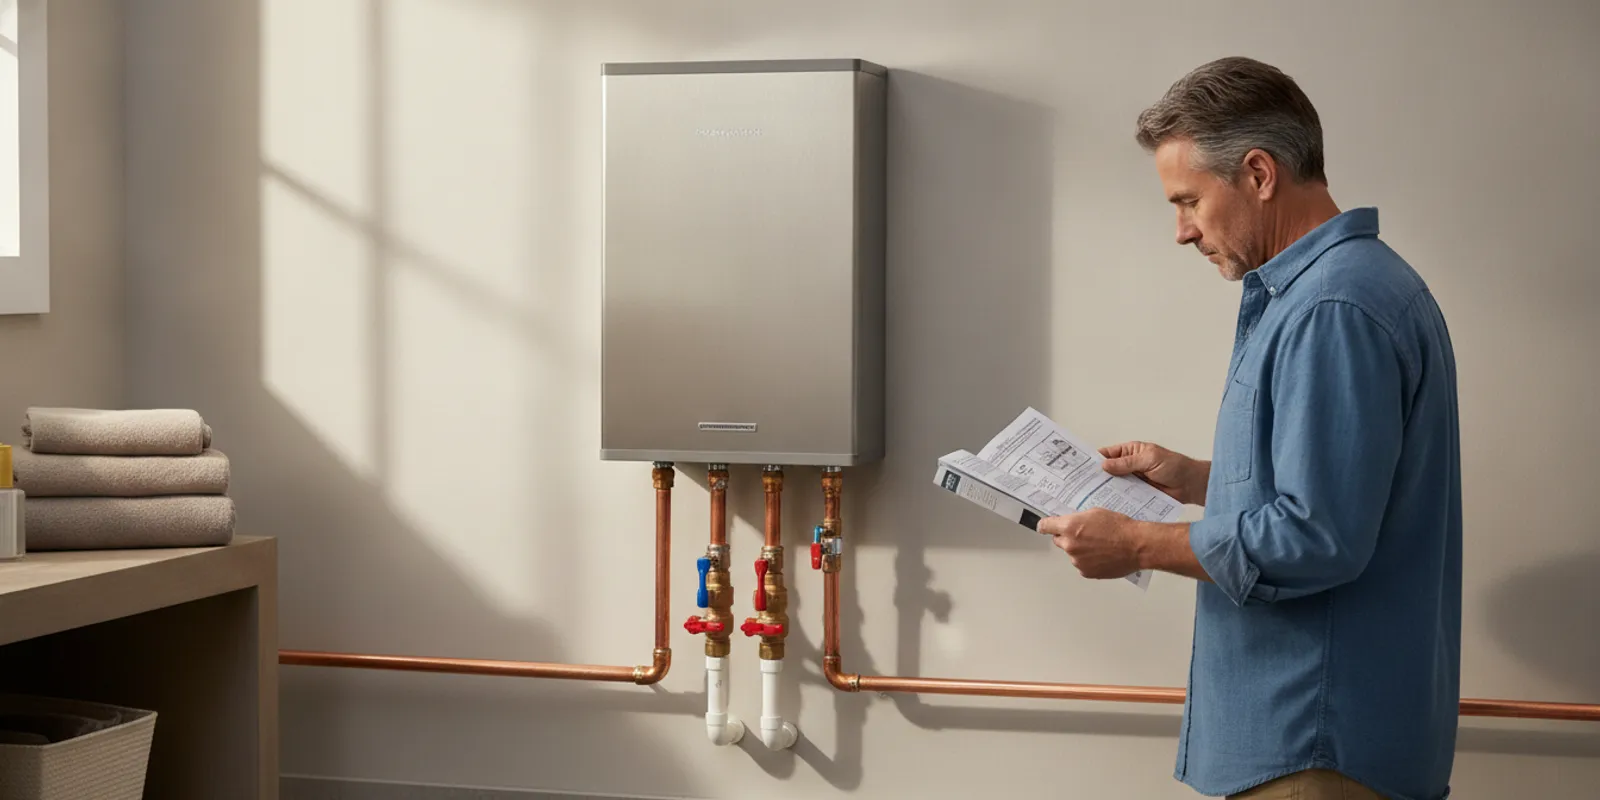
Homeowner checking the service connections on a wall-mounted tankless water heater

How to Flush a Tankless Water Heater Safely

Knowing how to flush a tankless water heater starts with identifying the exact model and reading its maintenance instructions. A flush circulates an approved descaling solution through the heat exchanger to loosen mineral deposits; it is not a universal fix for weak flow or temperature problems. Follow the manual for your appliance, and do not begin if you cannot identify the service ports, valves, or safe shutdown procedure.

Call about tankless water-heater service

Why is a tankless water heater flushed?

As water passes through a heater, dissolved minerals may leave deposits on internal surfaces. Buildup can interfere with heat transfer or water flow. Descaling is intended to loosen that material and carry it out of the heat exchanger. How quickly deposits accumulate depends on the water, appliance, and use; a calendar interval that suits one home may not suit another.

A flush is maintenance, not a diagnosis. Reduced hot-water flow, a temperature change, or an alert on the display may justify checking the owner’s manual, but none proves that scale is responsible. A closed or partly closed valve, a clogged inlet screen, a system fault, or another plumbing issue can produce similar symptoms. Repeating a flush without finding the cause may waste time and could expose the equipment to an unsuitable procedure.

For general background about drinking water and water quality, the U.S. Environmental Protection Agency is a useful starting point. General water-quality information does not replace the heater manufacturer’s maintenance directions or determine the condition of a particular home’s water.

What equipment may be needed?

For a model designed for a homeowner-performed flush, instructions may call for a small circulation pump, hoses that fit the service ports, a bucket, and an approved descaling solution. Some manufacturers specify the solution, connection arrangement, or circulation time. Do not assume vinegar or another household product is acceptable. Confirm the approved product and its handling and disposal directions before opening any service connection.

Item or check Why it matters What to confirm
Model-specific manual Defines the safe sequence and compatible materials Match the model number and read all warnings
Service valves and ports Allow the heater to be isolated and solution circulated Use only connections identified for maintenance
Pump and hoses Move solution through the heat exchanger Confirm fittings and arrangement match instructions
Approved descaler Loosens deposits when used as directed Check manufacturer approval and product label
Bucket and protective equipment Contain liquid and reduce exposure to splashes Follow label precautions; keep children and pets away
Clear work area Reduces trip, spill, and electrical risks Keep pump connections and power away from water

Do not substitute tools because they happen to fit. A hose that does not seat correctly can leak or come loose. A pump should be suitable for the prescribed arrangement, and electrical equipment must be kept away from spills. If the manual calls for equipment you do not have, or the connections appear damaged, stop rather than improvising.

How should you prepare before flushing?

Preparation matters as much as circulation. Locate the manual and record the model information from the exterior label, if accessible without removing a cover. Read the full maintenance section, including shutdown, isolation, rinse, restart, and disposal instructions. If you cannot find instructions for the specific unit, ask the manufacturer or a qualified plumber rather than relying on a procedure written for a different model.

  1. Check that the task is appropriate. Verify that the manual describes a homeowner procedure and that the appliance has the required service ports. Some heaters require a professional or use a different arrangement.
  2. Plan the work area. Clear a stable space for the bucket and pump. Keep cords and plugs away from water, protect nearby surfaces as appropriate, and keep children and pets away.
  3. Shut down as specified. Use the manufacturer’s directions to turn off the heater and, if specified, its electrical or fuel supply. Do not guess which breaker or gas control to use. Never work on internal wiring or gas piping as part of routine flushing.
  4. Allow hot water and components to cool. Hot water can cause burns. Do not open a connection while it may be hot or under pressure.
  5. Isolate the appliance. Close only the water valves identified in the manual for the flushing procedure. Tankless units and valve kits differ; do not turn an unfamiliar control just because it is near the heater.
  6. Relieve pressure only as directed. Follow the manual’s prescribed method. Do not loosen a fitting to test whether pressure remains.
  7. Connect hoses securely. Attach them to designated service ports and position the pump and bucket according to the instructions. If a fitting does not connect readily, stop; do not force or cross-thread it.

Before proceeding, check that the solution, pump, hoses, and connection points are compatible with the manufacturer’s procedure. Read the descaler label. Follow any protective-equipment and handling precautions. Do not mix products or leave chemicals unattended.

What is the general flushing sequence?

The following stages describe a common approach, not a universal procedure. Valve order, which port serves as inlet or return, solution type, circulation duration, and rinsing method vary. If your manual differs from this outline, follow the manual. Do not use these general steps to override an instruction or safety warning for your model.

  1. Confirm shutdown and isolation. Recheck that the heater is off and the water supply is isolated as directed. Do not proceed if a valve leaks, will not move, or is not clearly identified.
  2. Set up the circulation loop. Connect pump and hoses to the service ports in the configuration specified by the manufacturer. Keep hose ends secure and position them in the bucket as directed. Do not direct solution into household plumbing unless the instructions explicitly require it.
  3. Use the prescribed solution. Prepare the approved descaler exactly as its label and the manual state. Do not increase concentration or add another cleaner in an attempt to speed up the job.
  4. Circulate for the stated time. Start the pump only as directed and remain with the setup. Watch connections and the bucket. Stop the pump if a hose slips, a leak appears, the pump runs dry, liquid spills near electrical equipment, or the setup behaves unexpectedly.
  5. Stop and dispose of solution properly. Turn off the pump at the appropriate point. Follow the product label and local disposal requirements. Do not pour remaining solution into a drain or through the heater unless the instructions allow that method.
  6. Rinse as directed. The manufacturer may specify circulating clean water through the heat exchanger or another rinsing step. Follow the specified route and duration; do not improvise a bypass or assume a rinse is unnecessary.
  7. Disconnect and restore. With the pump off, disconnect hoses and close service ports as instructed. Restore water flow, power, and fuel in the sequence specified by the manual. Never energize or fire the heater before the required water flow and connections have been restored.
  8. Inspect and verify. Check accessible connections for leaks and follow the manual’s restart and error-check instructions. If an error appears, a leak develops, or the heater does not operate normally, shut it down using the approved method and seek help.

Do not force a stuck valve or fitting. A damaged port, unexpected pressure, persistent leak, or valve that will not close changes the task from routine maintenance to a repair concern. Leave the unit in a safe state only if you can do so using the instructions, and contact a plumber.

How do tankless models differ?

There is no single flushing schedule or sequence that applies to every tankless heater. Manufacturers may specify different ports, valve positions, chemicals, circulation times, rinsing procedures, and restart steps. The recommended maintenance interval may also depend on water conditions, usage, and the model. Do not use a generic interval as a substitute for the schedule in the manual.

Other maintenance may be described separately. An inlet filter or screen, water treatment equipment, condensate drain, venting system, and heat exchanger are not interchangeable components, and cleaning one does not automatically service the others. Do not remove a cover, clean an internal part, or alter venting unless the manual provides an appropriate procedure and you are qualified to perform it.

If the manual is missing, identify the model from the external label and seek matching instructions from the manufacturer. Avoid directions for a similar-looking unit: small differences in valve kits or controls can change the safe procedure. If the label is inaccessible without opening the case, leave that work to a professional. For information about the company’s water-heater installation and repair services, review its service page.

What should you check before deciding a flush is needed?

Start with observations that do not require opening the appliance. Note whether the problem affects one fixture or several, whether hot water changes only at certain times, and whether the display shows an error. Check that accessible hot-water fixtures are behaving consistently, but do not dismantle the heater or bypass a safety control. These details can help a technician distinguish a heater concern from a fixture or plumbing issue.

Next, compare what you observe with the troubleshooting section of the model manual. Follow only steps identified as safe for the owner. If the manual points to service, or the issue remains after a permitted basic check, arrange an assessment rather than repeating maintenance. A symptom log can help: note when the problem began, which fixtures are affected, any displayed code, recent changes to water use, and steps already taken. Record an error before clearing it, if the manual describes a safe way to do so.

These checks help avoid treating every hot-water complaint as scale. A flush can address deposits when the manufacturer’s procedure is appropriate, but it will not correct every control, plumbing, or equipment fault. If the unit makes unusual noises, leaks, shuts down repeatedly, or shows a warning, use the manual’s safety guidance and get qualified assistance.

How can you prepare for a service visit?

If you decide not to flush the unit yourself, you can prepare without disturbing the heater. Write down the model and serial information visible on the exterior, the approximate age if known, and maintenance history. Record the exact symptoms, when they occur, which fixtures are affected, and any error message or code. A photo of the display or exterior connections can document what you observed, provided you do not remove a cover or approach a hot or leaking area.

Tell the plumber whether the unit has been flushed before, what solution was used if known, and whether a valve or fitting leaked or resisted movement. Be clear about steps you did not take as well as steps you did. That information can help avoid repeating an unsuitable procedure. If there is active leaking, gas odor, or an electrical hazard, prioritize the manufacturer’s emergency safety instructions rather than gathering routine information.

Before maintenance begins, ask what the work includes: whether the technician will inspect the unit, follow its manufacturer-specific process, and check operation afterward. Ask how suspected scale or a separate fault will be evaluated. The answer should be based on the actual appliance and its condition, not a promise that descaling will correct every symptom.

When should you stop and call a plumber?

  • You cannot identify the exact model, service ports, or isolation valves with confidence.
  • The heater lacks the service connections required by its approved procedure, or the manual directs professional maintenance.
  • A valve or fitting is stuck, corroded, damaged, or begins leaking.
  • You encounter hot water or pressure you cannot safely manage, or a spill puts electrical equipment at risk.
  • You smell gas, see damaged wiring, or encounter an electrical fault. Do not continue troubleshooting internal systems.
  • The display shows an error you cannot resolve using the manufacturer’s owner instructions.
  • The heater remains unreliable after an approved maintenance procedure, or you are unsure how to restart it safely.

A plumber can assess the equipment and explain the next appropriate step. Hardenburgh Plumbing’s contact page provides a way to reach the company; this is a contact route, not a claim of online appointment booking. Do not describe a flush as a guaranteed repair before the cause of the problem is known.

Frequently asked questions

Can I use vinegar to flush any tankless water heater?

Not necessarily. Use only the solution and procedure approved for the exact model. A product allowed for one heater may not be approved for another, so check the manual before connecting a pump.

How often should a tankless water heater be flushed?

Follow the maintenance schedule in the manufacturer’s instructions. The appropriate interval can vary with the unit and water conditions; do not assume one schedule fits every household.

Will flushing fix low hot-water flow?

It may help if deposits are the cause, but low flow has other possible causes. If the issue persists, have the heater and relevant plumbing assessed instead of repeating a flush without diagnosis.

Can I flush a heater that has no service valves?

Do not improvise connections, remove parts, or use household plumbing connections as substitutes. Check the manual and contact a plumber if the unit lacks the service arrangement required for its approved procedure.

What if the heater shows an error after flushing?

Record the error and consult troubleshooting instructions for the exact model. Do not repeatedly reset the heater or bypass a safety feature; seek professional help if the manual does not provide a safe owner action.

Call Hardenburgh Plumbing about your water heater

Careful, model-specific maintenance is safer than following a generic sequence; when instructions, connections, or symptoms are unclear, leave the work to a qualified professional.
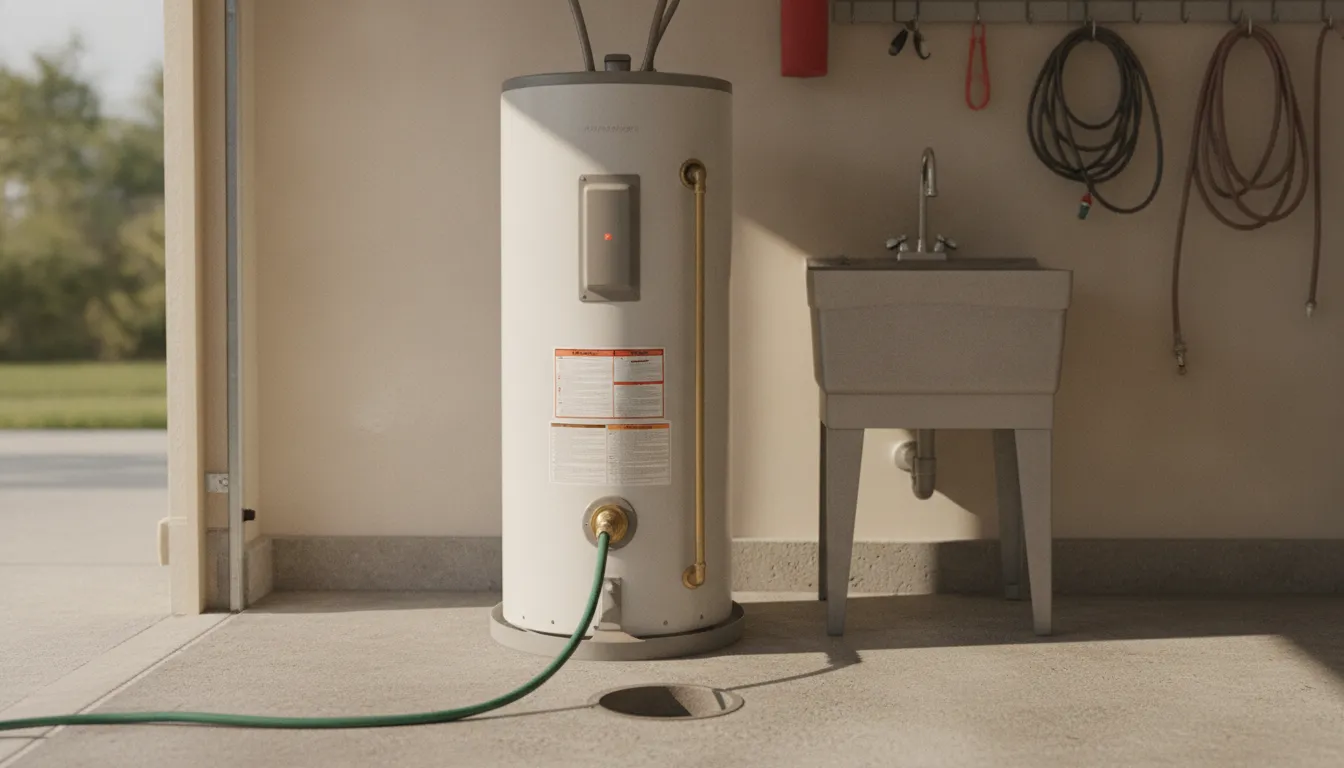
Garden hose attached to the drain valve of a residential tank water heater

How to Flush a Water Heater Safely

If the hot water runs out faster than it used to, or the tank pops and rumbles, sediment is a likely cause. Learning how to flush a water heater means draining the tank so mineral grit does not sit on the bottom and steal heat. If the water in your area is hard, a storage tank may collect that grit faster than one supplied by softer water.

Ask Hardenburgh Plumbing to flush or inspect the tank

This guide is for a standard tank heater, gas or electric. It is not a tankless descaling job, and it is not a repair manual. If the valve will not move, the tank is already leaking, or you smell gas, stop and call a plumber. The U.S. Department of Energy’s Building America program publishes a free flush sequence for storage tanks, and the steps below follow that same shutoff, drain, and refill order.

Why sediment builds up in storage water heaters

A storage heater holds 40 to 80 gallons. Cold water enters at the bottom. Heat rises, and you draw hot water from the top. Anything heavier than water stays low. Calcium and other minerals drop out of hard water and form a layer of sand and scale on the tank floor.

That layer causes three problems. It insulates the water from the burner or the lower heating element, so the unit runs longer to deliver the same hot water. It can crackle or rumble as steam bubbles force their way through the grit. It can also clog the drain valve, the small outlet near the floor of the tank.

Homes with harder water may see this sooner than homes with softer water. A heater that used to cover two showers may fade halfway through the second one. Flushing does not fix a failed element, a bad thermocouple, or a rusted tank. It only removes loose sediment so the heater can heat water the way it was built to.

The Building America Solution Center flush guide from the U.S. Department of Energy notes that sediment can coat the heating element and weaken heat transfer. Their sequence is the one to follow when the owner’s manual is missing or vague. If you still have the manual for your brand, use that first. The manual wins when the two disagree.

What a flush fixes, and what it does not

A flush is maintenance. It is not a diagnosis. Use the table below before you attach a hose. If the symptom is on the right, draining the tank will not solve it, and you may make a wet mess for nothing.

What you notice A flush may help Call a plumber instead
Hot water runs out sooner than it used to. Possibly, if sediment is contributing to the change. Call if hot water vanished all at once or the change persists after maintenance.
Popping, rumbling, or crackling from the tank. Yes, when the noise is sediment boiling on the bottom. Call if you also see water on the floor or rust at the seams.
Water looks cloudy or sandy for a minute after a long vacancy. Yes. A flush can clear loose grit from the tank. Call if every faucet runs sandy, including the cold side.
No hot water at all. No. A flush will not restore heat. Yes. Power, gas, a thermostat, or an element has failed.
The tank or fittings are already wet. No. Do not open the drain. Yes. A wet tank can mean a leak, not just sediment.
Rotten-egg smell on the hot side only. Sometimes. A flush plus anode attention may help. Call if the smell is strong, or you are not sure the anode is intact.

Hardenburgh Plumbing can repair or replace a tank that has moved past a simple flush. The water heater repair and installation page covers tank and tankless work. If you are unsure whether the unit is worth servicing at all, the guide on when to repair or replace a water heater walks through age and failure signs. This article stays on the flush itself.

How to flush a water heater, step by step

Plan on 30 to 90 minutes, because the tank has to cool, drain, and refill. Pick a morning when nobody needs a shower. You need a garden hose long enough to reach a floor drain, a utility sink, or the driveway. A flat-head screwdriver helps if the drain valve uses a plastic slot. Keep a bucket and a few rags under the valve, since the first water out is still hot.

Shut the heat source off first

Never drain a heater that can still fire. An electric element that runs in an empty tank burns out in minutes. A gas burner that fires into a low tank can overheat the steel.

  • Electric tank: switch the breaker off. Many heaters use a double breaker, two switches tied together. Confirm the label says water heater before you flip it.
  • Gas tank: set the gas control to the setting your unit’s label or manual specifies before draining. Do not turn the gas supply valve at the pipe unless the manual says to.

The tank and discharge water can remain hot enough to scald for several hours. Follow the manufacturer’s cooling instructions, and never use a touch test alone to decide that the tank is safe. If you cannot confirm that the tank and hose discharge have cooled, stop and call a qualified plumbing professional.

Stop the water in, then open a hot faucet

  1. Close the cold-water shutoff on top of the heater. It is usually a valve on the inlet pipe. Turn it clockwise until it stops. If that valve is stuck or weeping, stop. Forcing it can snap an old stem, and then you have an open supply line.
  2. Open a hot-water faucet somewhere on the same floor, ideally the nearest bathroom. Leave it open. Air has to enter as water leaves, or the tank will glug and stall.
  3. Attach the garden hose to the drain valve at the bottom of the tank. Run the other end to a floor drain, a utility sink, or outside, downhill from the heater. Do not drain scalding water onto a lawn you care about, and do not leave the hose end in a place where hot water can splash someone.
  4. Open the drain valve slowly. Plastic valves often turn with a screwdriver in a slot. Brass valves turn by hand. If the handle will not budge, do not use pliers. A cracked plastic valve becomes a leak you cannot shut.

Let the tank empty. The first few gallons may look gray, rusty, or sandy. That is the sediment you came for. If the flow slows to a trickle while the tank is still heavy, sediment is packed in the valve opening. Close the drain, then open the cold-water valve for 15 to 30 seconds to stir the bottom, and drain again. The Building America steps use that short cold-water pulse on purpose. Do not leave the cold valve open while the drain is open, or you will run the house supply straight onto the floor.

Flush until the water clears

When the tank is mostly empty, open the cold-water valve for short bursts while the drain stays open. You are rinsing the bottom, not refilling yet. Watch the hose water. Stop the bursts once it runs clear for a full minute. If it never clears, the layer may be scale, not loose sand, and a hose will not lift it.

Close the drain valve. Disconnect the hose only after the valve is fully closed, and tip the hose into the drain so it does not spit on the way out. Leave the hot faucet open.

Refill before you restore heat

  1. Open the cold-water shutoff and let the tank fill. You will hear air, then sputtering, at the open hot faucet. That sputtering is normal.
  2. Wait until the faucet runs a steady stream with no air. Then close the faucet.
  3. Look under the tank and at the drain valve for drips. A valve that was closed for years can weep after you exercise it. A slow drip at the valve threads needs a plumber, not another turn of the handle.
  4. Only then restore power or gas. Electric: flip the breaker back on. Gas: follow the control’s label or manual. If the pilot went out, the instructions are missing or illegible, or the burner does not light normally, do not relight it; call a qualified plumbing professional.

Set the thermostat back where it was. The U.S. Department of Energy recommends about 120°F for household storage heaters, which cuts scald risk and standby loss. If someone in the home needs a higher setting for a dishwasher without its own booster, leave the dial where a plumber last set it. Do not turn the dial to the maximum to “make up” for the flush. The tank is full of cold water and will recover on its own.

Skip laundry and long showers for a couple of hours. The first hot water can still carry a little cloudiness. That should fade. If it does not, or the rumbling returns within a day, the tank needs more than a hose.

Gas, electric, and tankless are not the same job

The drain sequence above fits a storage tank. The shutoff does not.

On an electric tank, the danger is the heating element. It must be off before the water level drops, and it must stay off until the tank is full and a hot faucet runs steady. If you are not sure which breaker is the heater, stop. Guessing can kill power to a well pump, a medical device, or half the house.

On a gas tank, the danger is lighting and fuel. If you smell gas, or notice a rotten-egg odor that could be gas, leave the area, do not use a switch or flame, and call the gas utility from outside. If the pilot went out, the instructions are missing or illegible, or the burner does not light normally, do not try to relight it. A thermocouple or gas valve that will not hold a flame is a repair, not a flush step.

A tankless unit has no tank to drain. Scale forms inside a narrow heat exchanger. Clearing it means isolating the unit, pumping a cleaning solution through the service ports, and flushing that solution out. A garden hose on a boiler drain will not do that job. Hardenburgh’s tankless water heater page is the right next stop if your unit hangs on the wall and heats water only when a tap opens. Do not pour vinegar or any cleaner into a storage tank and call it a flush.

When to stop and call a plumber

Most of the risk in this job shows up at the valves, not in the hose. Call Hardenburgh Plumbing and leave the drain closed if any of these are true:

  • The cold-water shutoff or the drain valve will not turn, or it turns and then leaks.
  • Water is already on the floor, on the top of the tank, or at a seam.
  • The heater is gas and will not relight, or you smell gas.
  • The drain spits only a dribble and pulsing the cold water does not clear it.
  • The tank is more than about ten years old and this is the first time anyone has opened the drain. Old plastic valves often fail the first time they move.
  • You are in a condo or a home where the heater sits in an attic, a closet over finished floors, or a pan with no working drain. A failed valve there floods the story below.

There is no charge to come out for an estimate, and some estimates can be done by video. That visit is not a free whole-house plumbing inspection. The tech explains the work and gets your approval before starting. We do not promise a clock time, a same-day finish, or that every town we serve gets every service at every hour. Emergency plumbing is separate from a booked maintenance visit. Weekend visits are by appointment.

If the flush goes well but the heater is loud again within a few weeks, the bottom may be solid scale, or the anode rod may be spent. Both are internal parts. Pulling an anode on an older tank can be the thing that finally starts a leak. That is a job for a qualified plumbing professional, not a second afternoon with a hose.

Call (561) 968-0000 when the valve sticks, the tank leaks, or you would rather not drain it yourself.

How often to flush a storage water heater

There is no single schedule for every storage tank. Follow the sticker on your heater or the manufacturer’s manual. If the heater is supplied by hard water, sediment may build up faster, so the manufacturer may recommend a shorter interval when the tank rumbles or hot water fades early. A heater that has gone five or ten years with no flush is a poor candidate for a first DIY drain, because the valve and the sediment have both had time to seize.

A flush is one piece of upkeep. It does not replace a temperature check, a look at the anode, or a pressure-relief valve test. Those are separate steps, and the relief valve should only be lifted by someone who is ready for it to fail open. If it sticks open, the tank will empty onto the floor until the cold valve is closed.

After a successful flush, write the date on a piece of tape on the tank. Next year you will know whether the rumbling came back early. Early return usually means hard scale, a failing lower element, or a tank that is near the end of its life, which is a repair-or-replace question rather than another flush.

Frequently asked questions

How do I flush a water heater without making a mess?

Shut the heat off, close the cold inlet, open one hot faucet, and run a hose from the bottom drain to a floor drain or outside before you open the valve. Open the drain slowly. If the valve leaks as soon as it moves, close it and stop. Keep rags and a bucket under the valve anyway. The first water is hot enough to scald.

Can I flush an electric water heater myself?

Yes, if you can identify the heater’s breaker and turn it off before the water level drops. Leave it off until the tank is full and a hot faucet runs in a steady stream. If the panel is unlabeled, do not guess. An element that energizes in a half-empty tank burns out.

How often should a storage water heater be flushed?

Follow the heater’s label or manufacturer’s manual rather than assuming one schedule fits every home. If the tank rumbles or hot water fades early, sediment may be contributing. A tank that has never been drained and is past about ten years old is safer in a qualified plumbing professional’s hands, because the drain valve may fail the first time it turns.

Does flushing help a tankless water heater?

No. Tankless units need a descaling flush through their service ports, not a hose on a tank drain. They have no storage tank for sediment to settle in. Use a plumber who services tankless heat exchangers rather than the steps in this guide.

What if the water stays rusty after a flush?

A little cloudiness right after the refill is normal and should clear. Rust that continues, or rust on the cold side too, is not a sediment problem. That can be the tank, the pipes, or the water supply. Stop repeating the flush and have a plumber look at it. Draining a rusting tank over and over does not seal a leak.

signs of a slab leak

Signs Of A Slab Leak In Your Florida Home

Owning and maintaining a home in South Florida comes with its fair share of climatic challenges, such as hurricanes and extreme heat. But there’s one threat to the structural integrity of your home that could lie within your home’s foundation. The majority of South Florida homes are built on a concrete slab foundation with main water lines running directly beneath it. Whenever an underground pipe bursts or cracks, you’re inevitably faced with a slab leak, which can lead to substantial damage to your home.

In this article, we look at the six top signs of a slab leak and how you can respond quickly before it wreaks havoc on your home’s structure.

signs of a slab leak

Six Signs Of A Slab Leak In Your Home

Be on the lookout for these common warning signs that all point towards a possible slab leak in your home.

1. An Unexpected Jump In Your Water Bill

Although monthly water bills are known to fluctuate slightly, any spike in your water bill without any significant change in your water usage habits should be cause for concern. If there’s no leak apparent within your surface plumbing, you may very well have an underground slab leak. Even a small leak can lead to significant water loss every day.

If you suspect a water leak, simply shut off your home’s water and check your water meter. If the dial is still spinning, you may have a hidden slab leak, and it’s time to call in the professionals.

2. Warm Spots On Your Floor

Have you ever walked barefoot across your floor and noticed a distinct warm spot? If so, you should pay closer attention. A warm spot can indicate a hot water pipe leak beneath your slab.

Most slab leaks occur in hot water lines due to the constant expansion and contraction of the line, causing it to deteriorate over time. Once your hot water pipe leaks, it will heat your concrete slab, which in turn transfers heat into your flooring. Another sign is if one of your pets sleeps in one specific spot on your floor, which could be due to the radiant heat caused by a hot water slab leak.

3. The Sound Of Running Water

Are you aware of a faint rushing sound when all your water sources are turned off? If your house is completely quiet at night and you’re hearing a constant hissing or trickling sound, you could have a slab leak.

Underground water lines are pressurized, which means water will exit any hole in your pipe with some force, causing a rushing sound. A leak can also vibrate against your slab, causing a low-grade vibration or hum. Reputable plumbers will utilize an advanced acoustic device to help detect specific vibrations before conducting a slab leak detection.

4. Developing Wall Or Floor Cracks

Rushing water from a slab leak can compromise your slab foundation by displacing the supportive soil beneath. Any shift in your foundation slab will have a knock-on effect on your walls and floors as increasing stress is placed on your overall home framework. The result could include cracked tiles or warped wooden floorboards. You should also be on the lookout for wall cracks around your door and window frames. Even a hard-to-close door could hint towards a shift in your home’s frame.

5. The Presence Of Mold Or Mildew

South Florida is no stranger to high humidity, which is a major contributor to the presence of mold and mildew growth. A slab leak will only add to moisture levels, causing moisture to rise up to your floor level if unchecked. Moist floor patches are a favorable environment for mold and mildew to breed.

Be on the lookout for any musty smells and moist spots on your flooring and at the bottom of your walls. Removing musty smells can be a challenging process that should only be done once the leak has been fixed. If you’re not sure what to look for, it’s best to get in an experienced plumber to conduct a full leak inspection in and around your home.

6. Low Water Pressure Throughout Your Home

A noticeable drop in water pressure could have several causes. If you can’t identify a visible water leak causing this, then it could be a sign of a slab leak. If you suspect a drop in water pressure, check to see if the drop in pressure is consistent across multiple fixtures in your home. Once confirmed, it’s best to call in a plumber for a professional leak assessment.

Know Your Slab Leak Repair Options

A plumbing specialist will utilize the most appropriate repair technique to effectively repair your slab leak. Repair techniques can include a minimally invasive approach such as pipe relining. This treatment consists of an epoxy coat that seals the pipe from the inside and is great for small leaks. For more substantial leaks, your plumber will either advise a pipe repair or a sectioned or complete re-piping treatment where old and corroded pipes are replaced with new ones. A reputable plumber will always give you a comprehensive walkthrough of the best-suited treatment method for your slab leak.

Call us now