How to Flush a Water Heater Safely
If the hot water runs out faster than it used to, or the tank pops and rumbles, sediment is a likely cause. Learning how to flush a water heater means draining the tank so mineral grit does not sit on the bottom and steal heat. If the water in your area is hard, a storage tank may collect that grit faster than one supplied by softer water.
Ask Hardenburgh Plumbing to flush or inspect the tank
This guide is for a standard tank heater, gas or electric. It is not a tankless descaling job, and it is not a repair manual. If the valve will not move, the tank is already leaking, or you smell gas, stop and call a plumber. The U.S. Department of Energy’s Building America program publishes a free flush sequence for storage tanks, and the steps below follow that same shutoff, drain, and refill order.
Why sediment builds up in storage water heaters
A storage heater holds 40 to 80 gallons. Cold water enters at the bottom. Heat rises, and you draw hot water from the top. Anything heavier than water stays low. Calcium and other minerals drop out of hard water and form a layer of sand and scale on the tank floor.
That layer causes three problems. It insulates the water from the burner or the lower heating element, so the unit runs longer to deliver the same hot water. It can crackle or rumble as steam bubbles force their way through the grit. It can also clog the drain valve, the small outlet near the floor of the tank.
Homes with harder water may see this sooner than homes with softer water. A heater that used to cover two showers may fade halfway through the second one. Flushing does not fix a failed element, a bad thermocouple, or a rusted tank. It only removes loose sediment so the heater can heat water the way it was built to.
The Building America Solution Center flush guide from the U.S. Department of Energy notes that sediment can coat the heating element and weaken heat transfer. Their sequence is the one to follow when the owner’s manual is missing or vague. If you still have the manual for your brand, use that first. The manual wins when the two disagree.
What a flush fixes, and what it does not
A flush is maintenance. It is not a diagnosis. Use the table below before you attach a hose. If the symptom is on the right, draining the tank will not solve it, and you may make a wet mess for nothing.
| What you notice | A flush may help | Call a plumber instead |
|---|---|---|
| Hot water runs out sooner than it used to. | Possibly, if sediment is contributing to the change. | Call if hot water vanished all at once or the change persists after maintenance. |
| Popping, rumbling, or crackling from the tank. | Yes, when the noise is sediment boiling on the bottom. | Call if you also see water on the floor or rust at the seams. |
| Water looks cloudy or sandy for a minute after a long vacancy. | Yes. A flush can clear loose grit from the tank. | Call if every faucet runs sandy, including the cold side. |
| No hot water at all. | No. A flush will not restore heat. | Yes. Power, gas, a thermostat, or an element has failed. |
| The tank or fittings are already wet. | No. Do not open the drain. | Yes. A wet tank can mean a leak, not just sediment. |
| Rotten-egg smell on the hot side only. | Sometimes. A flush plus anode attention may help. | Call if the smell is strong, or you are not sure the anode is intact. |
Hardenburgh Plumbing can repair or replace a tank that has moved past a simple flush. The water heater repair and installation page covers tank and tankless work. If you are unsure whether the unit is worth servicing at all, the guide on when to repair or replace a water heater walks through age and failure signs. This article stays on the flush itself.
How to flush a water heater, step by step
Plan on 30 to 90 minutes, because the tank has to cool, drain, and refill. Pick a morning when nobody needs a shower. You need a garden hose long enough to reach a floor drain, a utility sink, or the driveway. A flat-head screwdriver helps if the drain valve uses a plastic slot. Keep a bucket and a few rags under the valve, since the first water out is still hot.
Shut the heat source off first
Never drain a heater that can still fire. An electric element that runs in an empty tank burns out in minutes. A gas burner that fires into a low tank can overheat the steel.
- Electric tank: switch the breaker off. Many heaters use a double breaker, two switches tied together. Confirm the label says water heater before you flip it.
- Gas tank: set the gas control to the setting your unit’s label or manual specifies before draining. Do not turn the gas supply valve at the pipe unless the manual says to.
The tank and discharge water can remain hot enough to scald for several hours. Follow the manufacturer’s cooling instructions, and never use a touch test alone to decide that the tank is safe. If you cannot confirm that the tank and hose discharge have cooled, stop and call a qualified plumbing professional.
Stop the water in, then open a hot faucet
- Close the cold-water shutoff on top of the heater. It is usually a valve on the inlet pipe. Turn it clockwise until it stops. If that valve is stuck or weeping, stop. Forcing it can snap an old stem, and then you have an open supply line.
- Open a hot-water faucet somewhere on the same floor, ideally the nearest bathroom. Leave it open. Air has to enter as water leaves, or the tank will glug and stall.
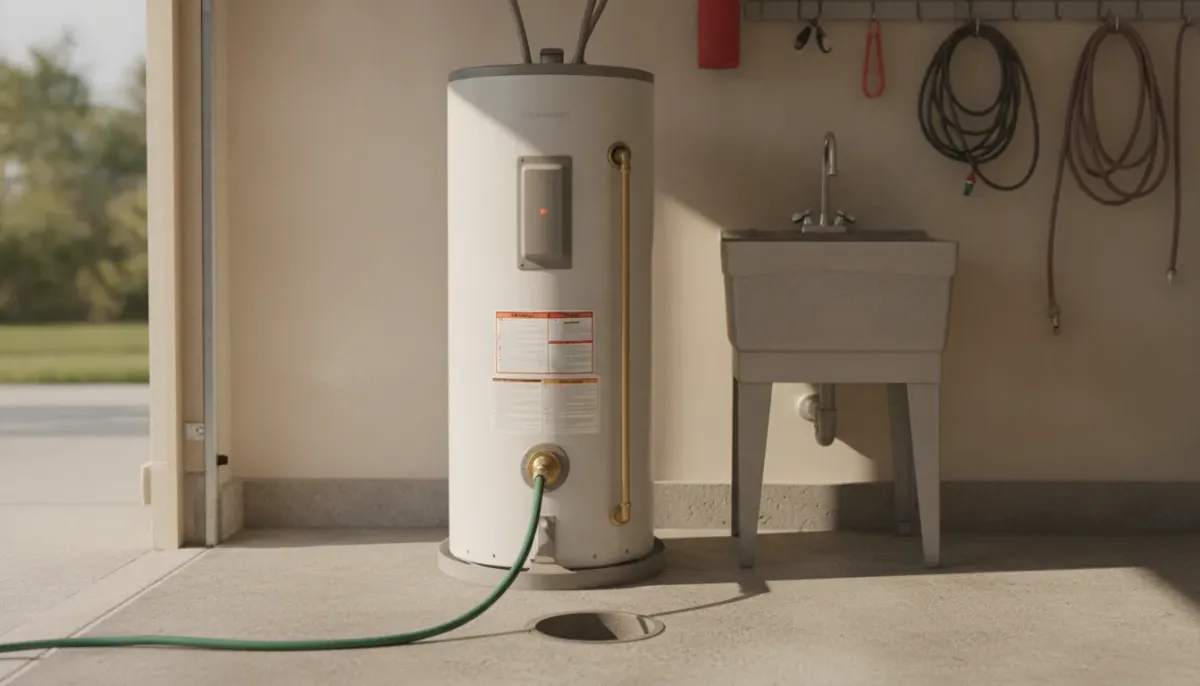
- Attach the garden hose to the drain valve at the bottom of the tank. Run the other end to a floor drain, a utility sink, or outside, downhill from the heater. Do not drain scalding water onto a lawn you care about, and do not leave the hose end in a place where hot water can splash someone.
- Open the drain valve slowly. Plastic valves often turn with a screwdriver in a slot. Brass valves turn by hand. If the handle will not budge, do not use pliers. A cracked plastic valve becomes a leak you cannot shut.
Let the tank empty. The first few gallons may look gray, rusty, or sandy. That is the sediment you came for. If the flow slows to a trickle while the tank is still heavy, sediment is packed in the valve opening. Close the drain, then open the cold-water valve for 15 to 30 seconds to stir the bottom, and drain again. The Building America steps use that short cold-water pulse on purpose. Do not leave the cold valve open while the drain is open, or you will run the house supply straight onto the floor.
Flush until the water clears
When the tank is mostly empty, open the cold-water valve for short bursts while the drain stays open. You are rinsing the bottom, not refilling yet. Watch the hose water. Stop the bursts once it runs clear for a full minute. If it never clears, the layer may be scale, not loose sand, and a hose will not lift it.
Close the drain valve. Disconnect the hose only after the valve is fully closed, and tip the hose into the drain so it does not spit on the way out. Leave the hot faucet open.
Refill before you restore heat
- Open the cold-water shutoff and let the tank fill. You will hear air, then sputtering, at the open hot faucet. That sputtering is normal.
- Wait until the faucet runs a steady stream with no air. Then close the faucet.
- Look under the tank and at the drain valve for drips. A valve that was closed for years can weep after you exercise it. A slow drip at the valve threads needs a plumber, not another turn of the handle.
- Only then restore power or gas. Electric: flip the breaker back on. Gas: follow the control’s label or manual. If the pilot went out, the instructions are missing or illegible, or the burner does not light normally, do not relight it; call a qualified plumbing professional.
Set the thermostat back where it was. The U.S. Department of Energy recommends about 120°F for household storage heaters, which cuts scald risk and standby loss. If someone in the home needs a higher setting for a dishwasher without its own booster, leave the dial where a plumber last set it. Do not turn the dial to the maximum to “make up” for the flush. The tank is full of cold water and will recover on its own.
Skip laundry and long showers for a couple of hours. The first hot water can still carry a little cloudiness. That should fade. If it does not, or the rumbling returns within a day, the tank needs more than a hose.
Gas, electric, and tankless are not the same job
The drain sequence above fits a storage tank. The shutoff does not.
On an electric tank, the danger is the heating element. It must be off before the water level drops, and it must stay off until the tank is full and a hot faucet runs steady. If you are not sure which breaker is the heater, stop. Guessing can kill power to a well pump, a medical device, or half the house.
On a gas tank, the danger is lighting and fuel. If you smell gas, or notice a rotten-egg odor that could be gas, leave the area, do not use a switch or flame, and call the gas utility from outside. If the pilot went out, the instructions are missing or illegible, or the burner does not light normally, do not try to relight it. A thermocouple or gas valve that will not hold a flame is a repair, not a flush step.
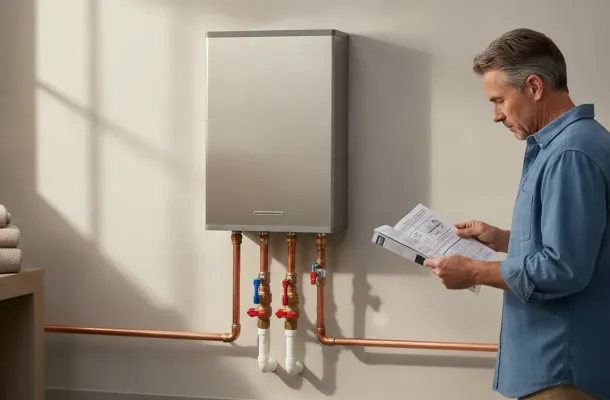
A tankless unit has no tank to drain. Scale forms inside a narrow heat exchanger. Clearing it means isolating the unit, pumping a cleaning solution through the service ports, and flushing that solution out. A garden hose on a boiler drain will not do that job. Hardenburgh’s tankless water heater page is the right next stop if your unit hangs on the wall and heats water only when a tap opens. Do not pour vinegar or any cleaner into a storage tank and call it a flush.
When to stop and call a plumber
Most of the risk in this job shows up at the valves, not in the hose. Call Hardenburgh Plumbing and leave the drain closed if any of these are true:
- The cold-water shutoff or the drain valve will not turn, or it turns and then leaks.
- Water is already on the floor, on the top of the tank, or at a seam.
- The heater is gas and will not relight, or you smell gas.
- The drain spits only a dribble and pulsing the cold water does not clear it.
- The tank is more than about ten years old and this is the first time anyone has opened the drain. Old plastic valves often fail the first time they move.
- You are in a condo or a home where the heater sits in an attic, a closet over finished floors, or a pan with no working drain. A failed valve there floods the story below.
There is no charge to come out for an estimate, and some estimates can be done by video. That visit is not a free whole-house plumbing inspection. The tech explains the work and gets your approval before starting. We do not promise a clock time, a same-day finish, or that every town we serve gets every service at every hour. Emergency plumbing is separate from a booked maintenance visit. Weekend visits are by appointment.
If the flush goes well but the heater is loud again within a few weeks, the bottom may be solid scale, or the anode rod may be spent. Both are internal parts. Pulling an anode on an older tank can be the thing that finally starts a leak. That is a job for a qualified plumbing professional, not a second afternoon with a hose.
Call (561) 968-0000 when the valve sticks, the tank leaks, or you would rather not drain it yourself.
How often to flush a storage water heater
There is no single schedule for every storage tank. Follow the sticker on your heater or the manufacturer’s manual. If the heater is supplied by hard water, sediment may build up faster, so the manufacturer may recommend a shorter interval when the tank rumbles or hot water fades early. A heater that has gone five or ten years with no flush is a poor candidate for a first DIY drain, because the valve and the sediment have both had time to seize.
A flush is one piece of upkeep. It does not replace a temperature check, a look at the anode, or a pressure-relief valve test. Those are separate steps, and the relief valve should only be lifted by someone who is ready for it to fail open. If it sticks open, the tank will empty onto the floor until the cold valve is closed.
After a successful flush, write the date on a piece of tape on the tank. Next year you will know whether the rumbling came back early. Early return usually means hard scale, a failing lower element, or a tank that is near the end of its life, which is a repair-or-replace question rather than another flush.
Frequently asked questions
How do I flush a water heater without making a mess?
Shut the heat off, close the cold inlet, open one hot faucet, and run a hose from the bottom drain to a floor drain or outside before you open the valve. Open the drain slowly. If the valve leaks as soon as it moves, close it and stop. Keep rags and a bucket under the valve anyway. The first water is hot enough to scald.
Can I flush an electric water heater myself?
Yes, if you can identify the heater’s breaker and turn it off before the water level drops. Leave it off until the tank is full and a hot faucet runs in a steady stream. If the panel is unlabeled, do not guess. An element that energizes in a half-empty tank burns out.
How often should a storage water heater be flushed?
Follow the heater’s label or manufacturer’s manual rather than assuming one schedule fits every home. If the tank rumbles or hot water fades early, sediment may be contributing. A tank that has never been drained and is past about ten years old is safer in a qualified plumbing professional’s hands, because the drain valve may fail the first time it turns.
Does flushing help a tankless water heater?
No. Tankless units need a descaling flush through their service ports, not a hose on a tank drain. They have no storage tank for sediment to settle in. Use a plumber who services tankless heat exchangers rather than the steps in this guide.
What if the water stays rusty after a flush?
A little cloudiness right after the refill is normal and should clear. Rust that continues, or rust on the cold side too, is not a sediment problem. That can be the tank, the pipes, or the water supply. Stop repeating the flush and have a plumber look at it. Draining a rusting tank over and over does not seal a leak.